
Talk to your Raspberry Pi | HackSpace 36
from Raspberry Pi Blog – Raspberry Pi
Author Andrew Gregory
In the latest issue of HackSpace Magazine, out now,
@MrPJEvans shows you how to add voice commands to your projects with a Raspberry Pi 4 and a microphone.You’ll need:
- Raspberry Pi 4 Model B (earlier models will work too)
- Seeed ReSpeaker 4-Mic Array
- Google account
It’s amazing how we’ve come from everything being keyboard-based to so much voice control in our lives. Siri, Alexa, and Cortana are everywhere and happy to answer questions, play you music, or help automate your household.
For the keen maker, these offerings may not be ideal for augmenting their latest project as they are closed systems. The good news is, with a bit of help from Google, you can add voice recognition to your project and have complete control over what happens. You just need a Raspberry Pi 4, a speaker array, and a Google account to get started.
Set up your microphone
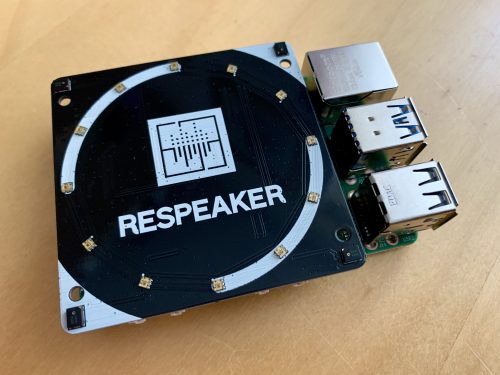
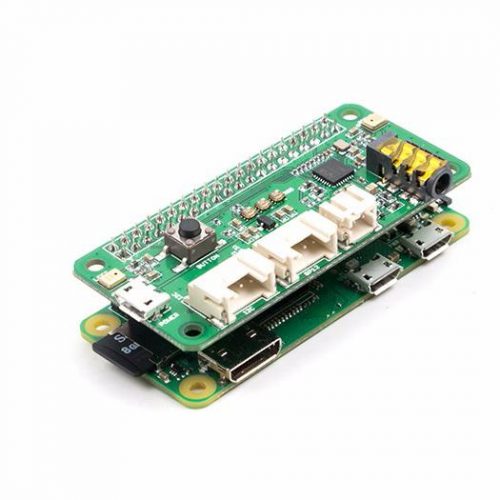
For a home assistant device, being able to hear you clearly is an essential. Many microphones are either too low-quality for the task, or are unidirectional: they only hear well in one direction. To the rescue comes Seeed’s ReSpeaker, an array of four microphones with some clever digital processing to provide the kind of listening capability normally found on an Amazon Echo device or Google Assistant. It’s also in a convenient HAT form factor, and comes with a ring of twelve RGB LEDs, so you can add visual effects too. Start with a Raspberry Pi OS Lite installation, and follow these instructions to get your ReSpeaker ready for use.
Install Snowboy
You’ll see later on that we can add the power of Google’s speech-to-text API by streaming audio over the internet. However, we don’t want to be doing that all the time. Snowboy is an offline ‘hotword’ detector. We can have Snowboy running all the time, and when your choice of word is ‘heard’, we switch to Google’s system for accurate processing. Snowboy can only handle a few words, so we only use it for the ‘trigger’ words. It’s not the friendliest of installations so, to get you up and running, we’ve provided step-by-step instructions.
Create your own hotword
As we’ve just mentioned, we can have a hotword (or trigger word) to activate full speech recognition so we can stay offline. To do this, Snowboy must be trained to understand the word chosen. The code that describes the word (and specifically your pronunciation of it) is called the model. Luckily, this whole process is handled for you at snowboy.kitt.ai, where you can create a model file in a matter of minutes and download it. Just say your choice of words three times, and you’re done. Transfer the model to your Raspberry Pi 4 and place it in your home directory.
Let’s go Google
After the trigger word is heard, we want Google’s fleet of super-servers to help us transcribe what is being said. To use Google’s speech-to-text API, you will need to create a Google application and give it permissions to use the API. When you create the application, you will be given the opportunity to download ‘credentials’ (a small text file) which will allow your setup to use the Google API. Please note that you will need a billable account for this, although you get one hour of free speech-to-text per month. Full instructions on how to get set up can be found here.
Install the SDK and transcriber
To use Google’s API, we need to install the firm’s speech-to-text SDK for Python so we can stream audio and get the results. On the command line, run the following:pip3 install google-cloud-speech(If you get an error, run sudo apt install python3-pip then try again).
Remember that credentials file? We need to tell the SDK where it is:
export GOOGLE_APPLICATION_CREDENTIALS="/home/pi/[FILE_NAME].json"(Don’t forget to replace [FILE_NAME] with the actual name of the JSON file.)
Now download and run this test file. Try saying something and see what happens!
Putting it all together
Now we can talk to our Raspberry Pi, it’s time to link the hotword system to the Google transcription service to create our very own virtual assistant. We’ve provided sample code so that you can see these two systems running together. Run it, then say your chosen hotword. Now ask ‘what time is it?’ to get a response. (Don’t forget to connect a speaker to the audio output if you’re not using HDMI.) Now it’s over to you. Try adding code to respond to certain commands such as ‘turn the light on’, or ‘what time is it?’
Get HackSpace magazine 36 Out Now!

Each month, HackSpace magazine brings you the best projects, tips, tricks and tutorials from the makersphere. You can get it from the Raspberry Pi Press online store, The Raspberry Pi store in Cambridge, or your local newsagents.
Each issue is free to download from the HackSpace magazine website.
The post Talk to your Raspberry Pi | HackSpace 36 appeared first on Raspberry Pi.
Comments
Post a Comment